A Reforger server loads the mods listed in the mods array of its config.json, and downloads them when it starts. In the ArthOS panel you add them from the Mods page, then restart the server.
In the ArthOS panel
- Open your server and choose Mods.
- Open the Workshop tab. Search by name, or browse with the sort menu (Most popular, Newest, Best rated).
- Select a mod’s picture to read its details, or choose Add on its card.
- The panel adds the mod at the end of your list. If the mod needs other mods, it puts them directly above it, and the message says so: “{name} added, with 2 mods it needs.”
- Open On this server to see the list. A new row says “not downloaded yet”.
- Restart the server. It downloads the mods on the list as it starts, and each row then shows the installed version. Players download the same mods when they first join.
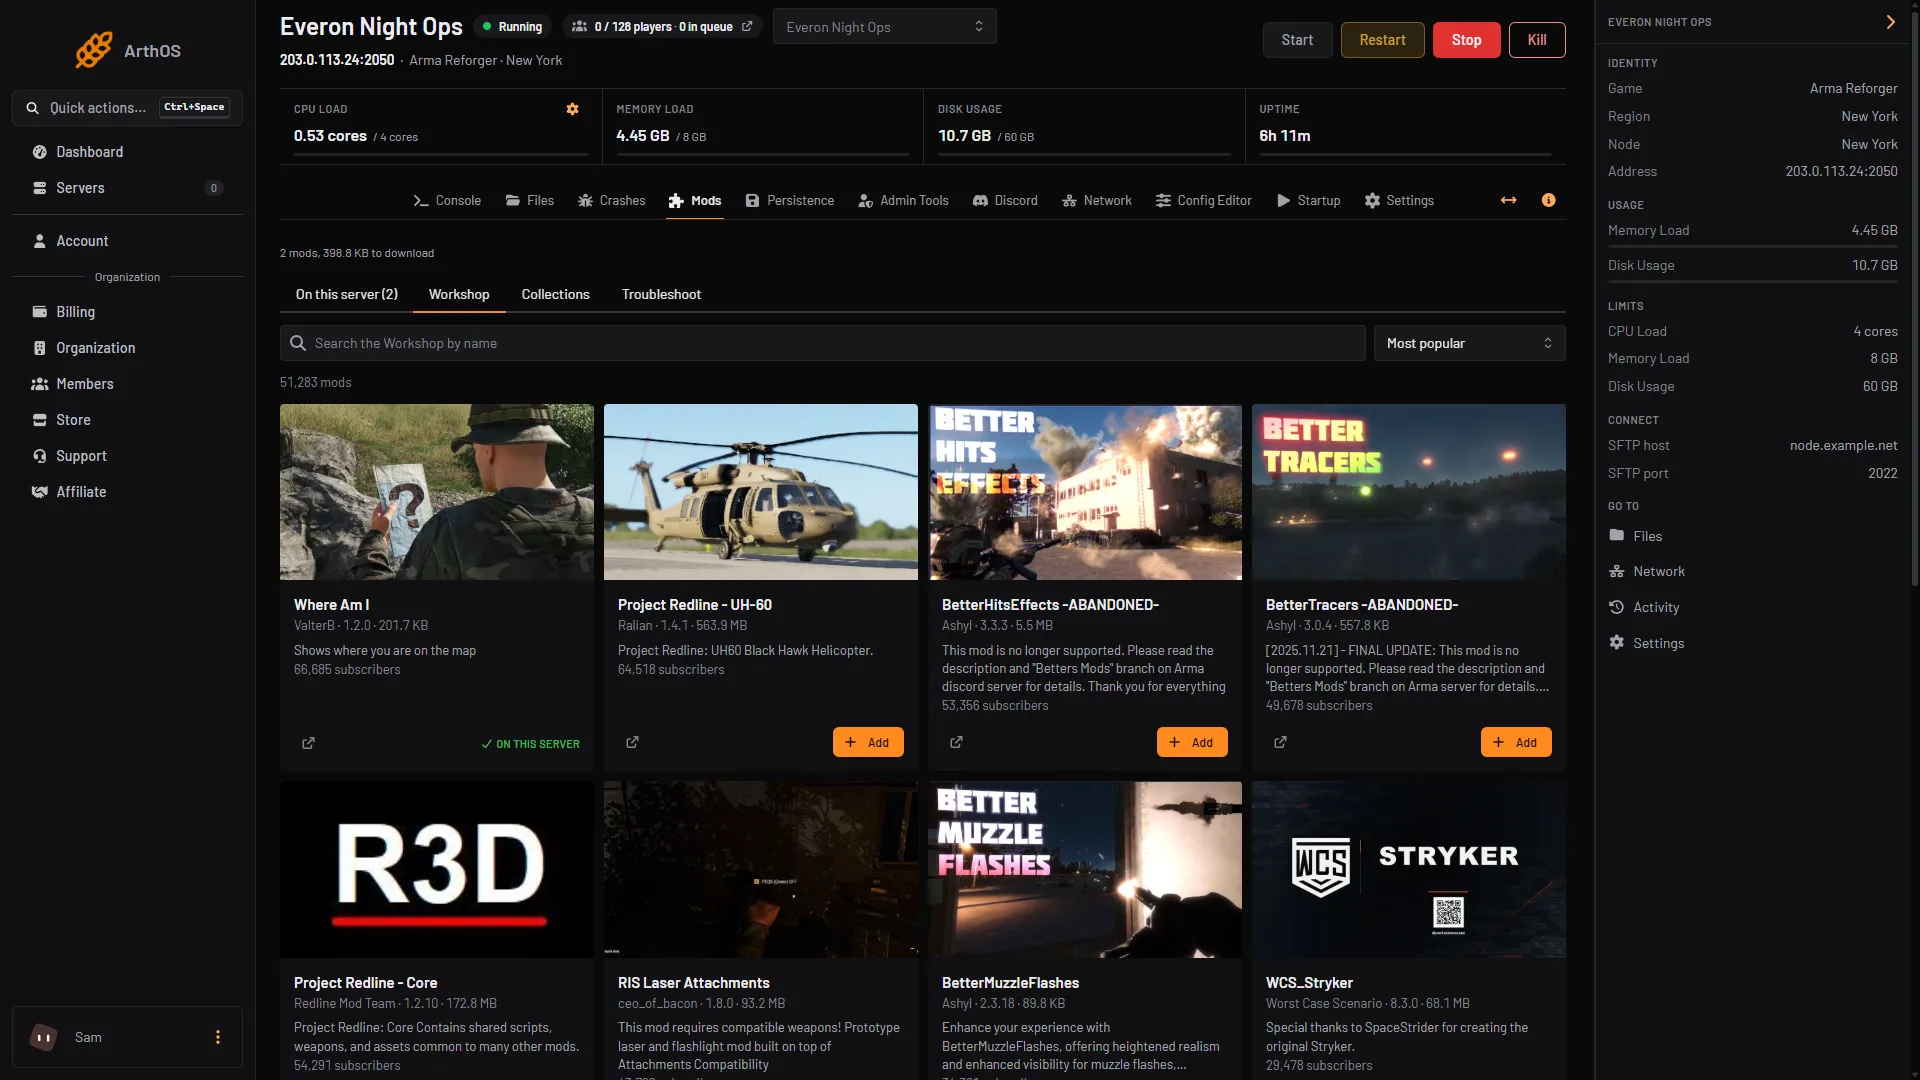
- Workshop tab
- Search by name
- Sort menu
- Add
Click Workshop (1), type a name in the search box (2), change the order with the sort menu (3), and choose Add (4) on the card you want. A mod already on the list shows On this server instead of Add. You need permission to edit files on the server to add or remove mods; without it the page is read only.
A mod adds content; it does not change the game mode by itself. To play a mission that comes with a mod, pick or paste its scenario in Config Editor under Scenario, then restart. See scenario IDs.
Take a mod off or lock a version
The version menu (1) on each row defaults to Latest. Pick a version to lock the mod to it; load order, presets and folders shows how to lock every mod at once. To take a mod off, choose the bin icon (2) on its row, or tick several rows and choose Remove. The mod stops loading at the next start. Its files stay in /profile/addons in Files.
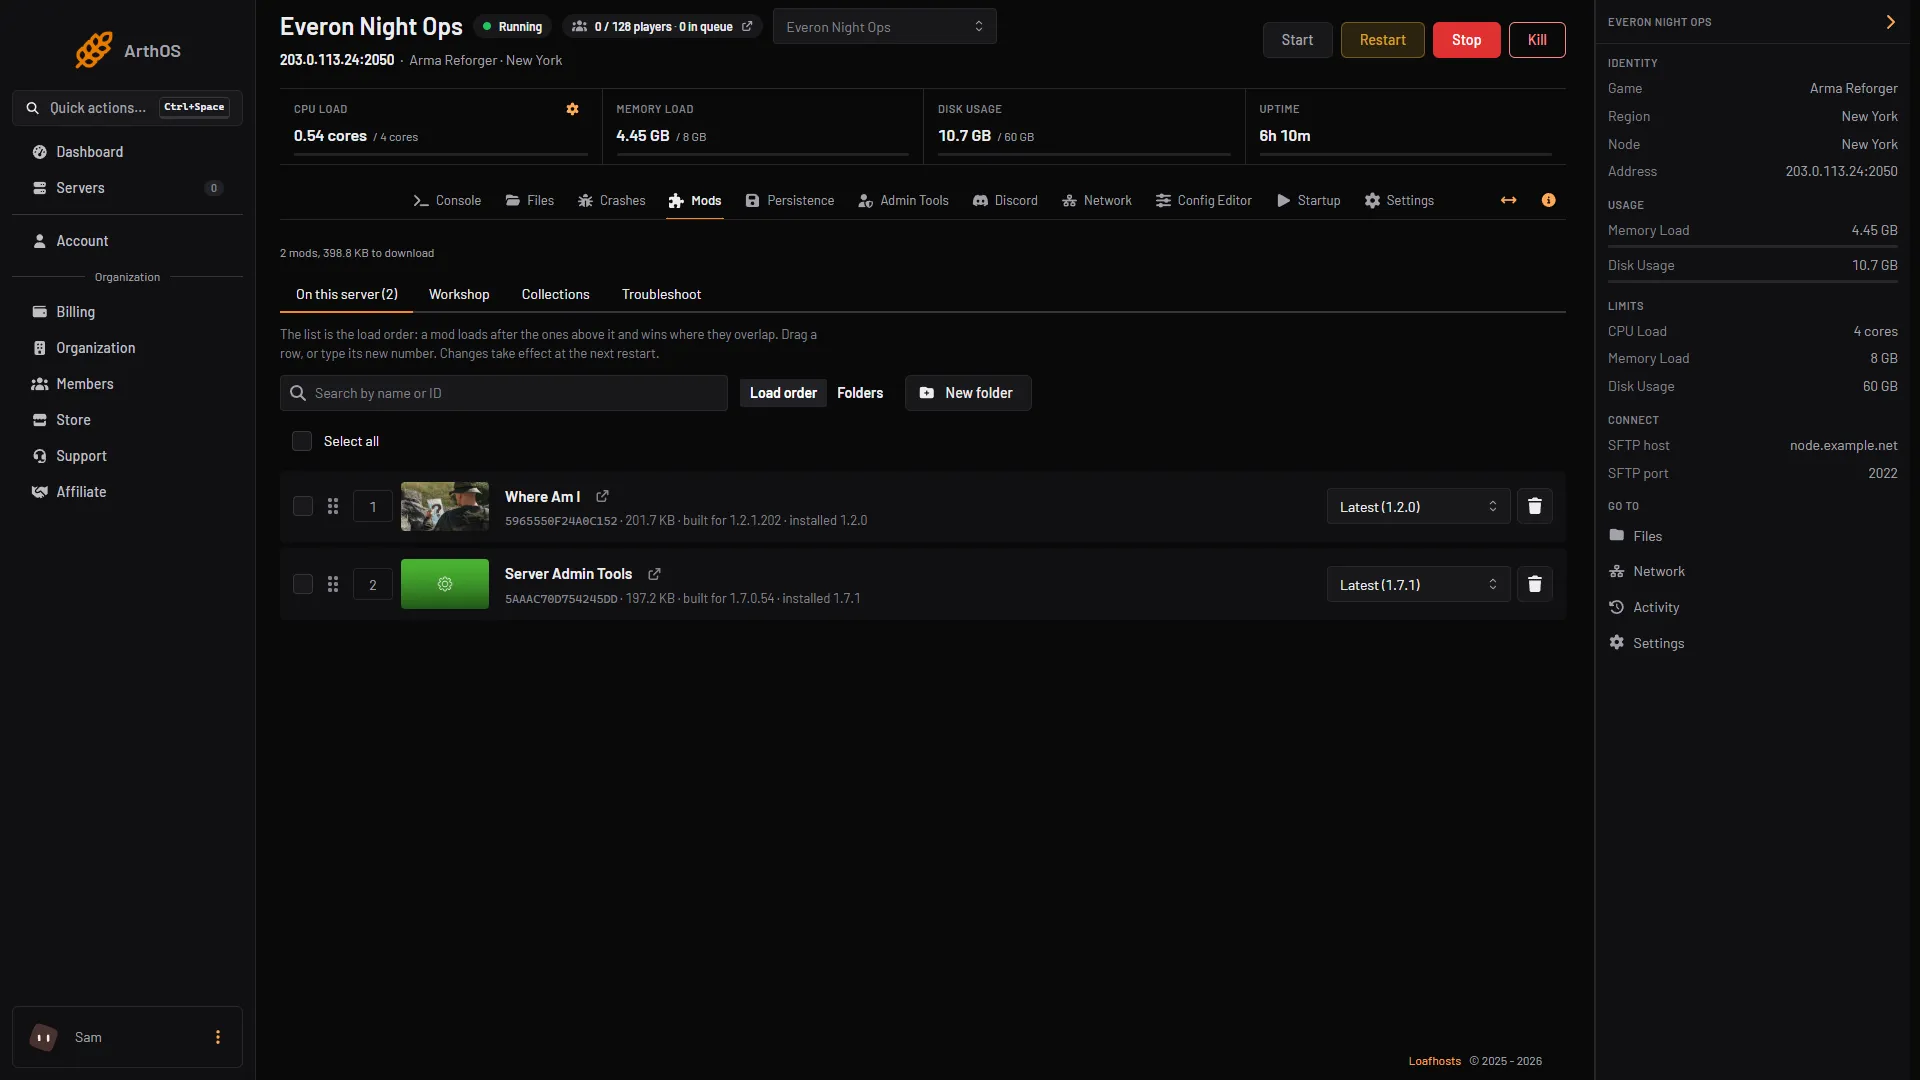
- Version menu
- Remove
By hand
Edit config.json (in Files on the panel, or on your own host) and add the mod to game.mods:
{
  "game": {
    "mods": [
      {
        "modId": "5AAF6D5352E5FCAB",
        "name": "Project Redline - Core"
      },
      {
        "modId": "59D64ADD6FC59CBF",
        "name": "Project Redline - UH-60",
        "version": "1.4.1"
      }
    ]
  }
}
What each key does, from Bohemia’s server config documentation:
modId: the mod’s GUID. Copy it from the mod’s Workshop page, where it is listed as ID. See how to find a mod ID.name: does nothing. It is only a comment so you can read the list.version: optional. Leave it out and the latest version is used.required: optional, true by default. Set it tofalseand a mod the server cannot download is dropped from the list with a warning in the log, instead of stopping the server.
Bohemia also describes a shortcut: in the game’s Mod manager, the JSON tab has a Copy to clipboard button that produces a ready list.
Save the file and restart the server. The panel does the same edit for you, and its page refuses a change if the file changed since the page loaded, so you never overwrite a newer list.
If it does not work
- The server will not start after adding a mod. One bad entry can stop it: a wrong ID, a mod removed from the Workshop, or a mod that needs another one that is missing. Open the Troubleshoot tab on the Mods page for what the last start said, or follow find the mod that stops your server.
- The mod does not show on the Workshop tab. Search is by name. A mod that is not listed publicly cannot be found by a name search; add its ID by hand as above.
- A change did nothing. Mods only load on a restart. Check the row says “installed” with a version after the server has started.
- The panel says “Not started” after a hand edit. A comma after the last entry or a missing quote makes
config.jsoninvalid, and the panel refuses to start the server until it is fixed. It names the line and column; fix it in Files, or restore a backup.
Need a server to try this on? See Arma Reforger servers.
Sources: Bohemia wiki: Server Config, reforger.armaplatform.com: Workshop