
Most mods come from the Steam Workshop, and the Mods page installs those for you. Some mods are not on the Workshop. For those you upload the folder yourself in Files. The panel leaves a folder you uploaded exactly as it is.
Before you upload
- Name the folder in lowercase, with no spaces, and start the name with
@. For example@mymod, not@My Modand notmymod. A Linux server wants lowercase names, and the Mods page only offers folders whose names start with@. - Check the files inside are lowercase too. If you cannot rename them, see make mod files lowercase.
- Check the mod can run on Linux. A mod that ships its extension only as a Windows
.dll, with no_x64.sobeside it, cannot run on the server. The Crashes page then shows “A mod’s extension did not load”. - Find the mod’s
.bikeyfile. Players are checked against it. See mod keys and signatures.
Upload the folder
- Open Files. You start in the server’s main folder, where mod folders live.
- Choose New (1 in the first picture), then Directory from Upload (1 in the second picture).
- Pick the mod’s folder on your computer. Wait until the upload finishes.
- Open
keys(2 in the first picture), choose New, then File from Upload, and send the mod’s.bikey.
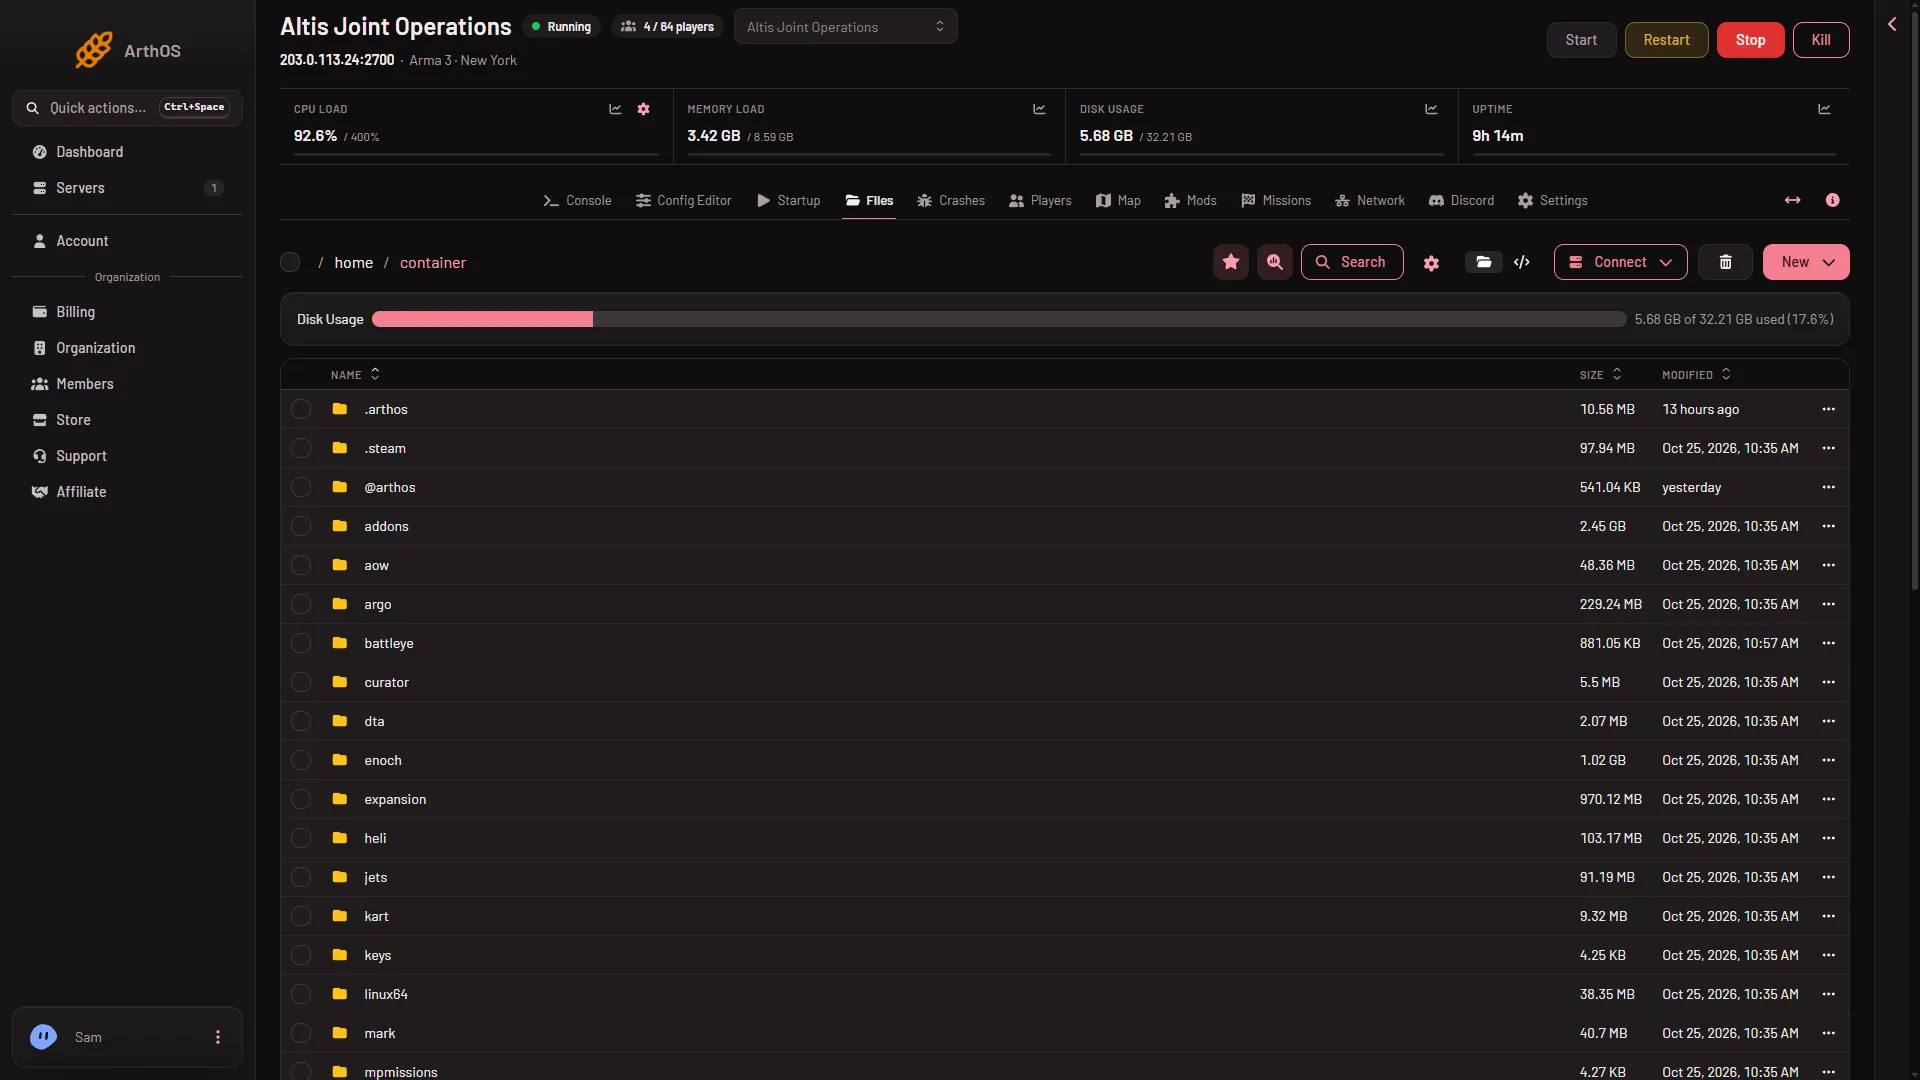
- New
- keys
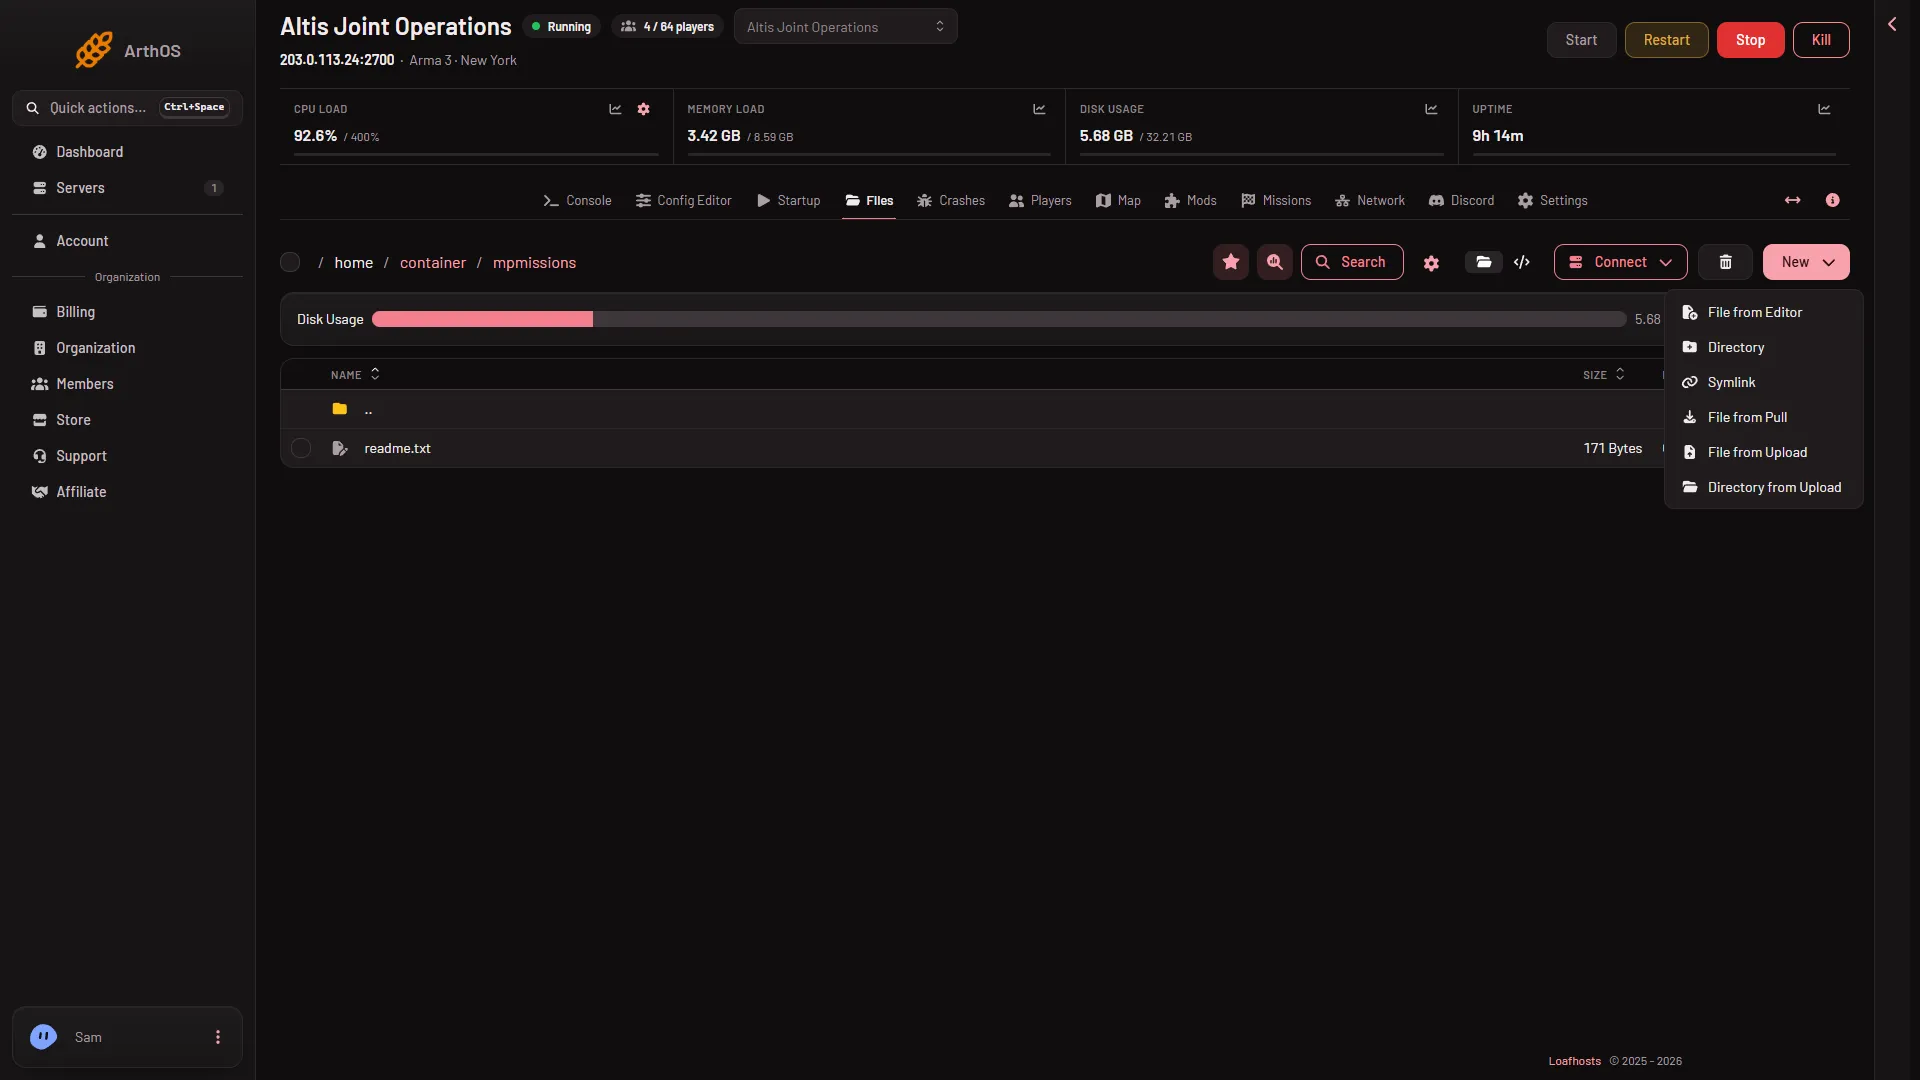
- Directory from Upload
For a big mod, SFTP is faster. Choose Connect, then via SFTP, and copy the folder with your own SFTP program.
Put it on the list
The server only loads mods that are on the list on the Mods page. A folder you uploaded is not on it yet.
- Open the Mods page. Under On the server, not loaded, find your folder.
- Choose Put on the list.
- Choose Apply, or Apply and restart while the server runs.
Applying a running server stops it and drops everyone who is on. Warn them first with A message to everyone on the Players page, then choose Send.
What the Mods page shows
The page never edits or deletes a folder it did not download. Once the folder is on the list, its row has the chip Local folder. The row says: “A folder on the server that is not a Workshop download. It is never changed here.”
Because the page never changes it, it never updates it. When the author releases a new version, you upload the new folder yourself.
Other texts you may meet:
- A line under the list: “Also in the mods folder, and left as they are”, followed by folder names. A folder whose name does not start with
@is only named there. The page does not offer to load it. - A row that says “A folder name with no folder on the server, so it loads nothing.” The name is on the list but the folder is not on the server. Upload the folder, or take the name off.
- A row that says “A copy of a Workshop mod, made by hand. The Workshop copy can be kept up to date.” Choose Use the Workshop copy and the panel downloads and updates it for you.
Players need it too
A mod that every player loads must be on their computers too, in the same version. Send them the folder, or the author’s download link. A server-only mod is the exception: players do not need it.
If it does not work
- The folder is not under On the server, not loaded. Check that its name starts with
@, then reload the page. - The game does not find the mod. Check the folder name is lowercase with no spaces, that the mod is on the list, and that you applied.
- Players are refused at the door. The mod’s
.bikeyis missing fromkeys, or their copy is a different version.
More about the game: Arma 3 servers.