
To move a whole server from another host, open Settings on your new server and use the Import from another host card. You give it your old host’s address, user name and password, and it copies the server’s files in over SFTP or FTP. If you would rather do it yourself, download a zip from the old host and upload it here. Both ways are below.
What you need
- The address of your old host’s file access (SFTP or FTP). It is a name such as
files.oldhost.net, not the game address. If you cannot find it, ask your old host. - A user name and a password for it.
- The folder that holds the server (the one with
server.propertiesin it), if it is not the top folder.
The address must be a public host name or a public IPv4 address. Private, local and IPv6 addresses are refused.
In the ArthOS panel
- Stop the old server first, so its files are not changing while they are copied.
- Open your new server and choose Settings. Find the Import from another host card. It says: “Copy a server’s files in from your old host over SFTP or FTP. The copy runs on the node; the panel never keeps your password.” Choose Import files (1).
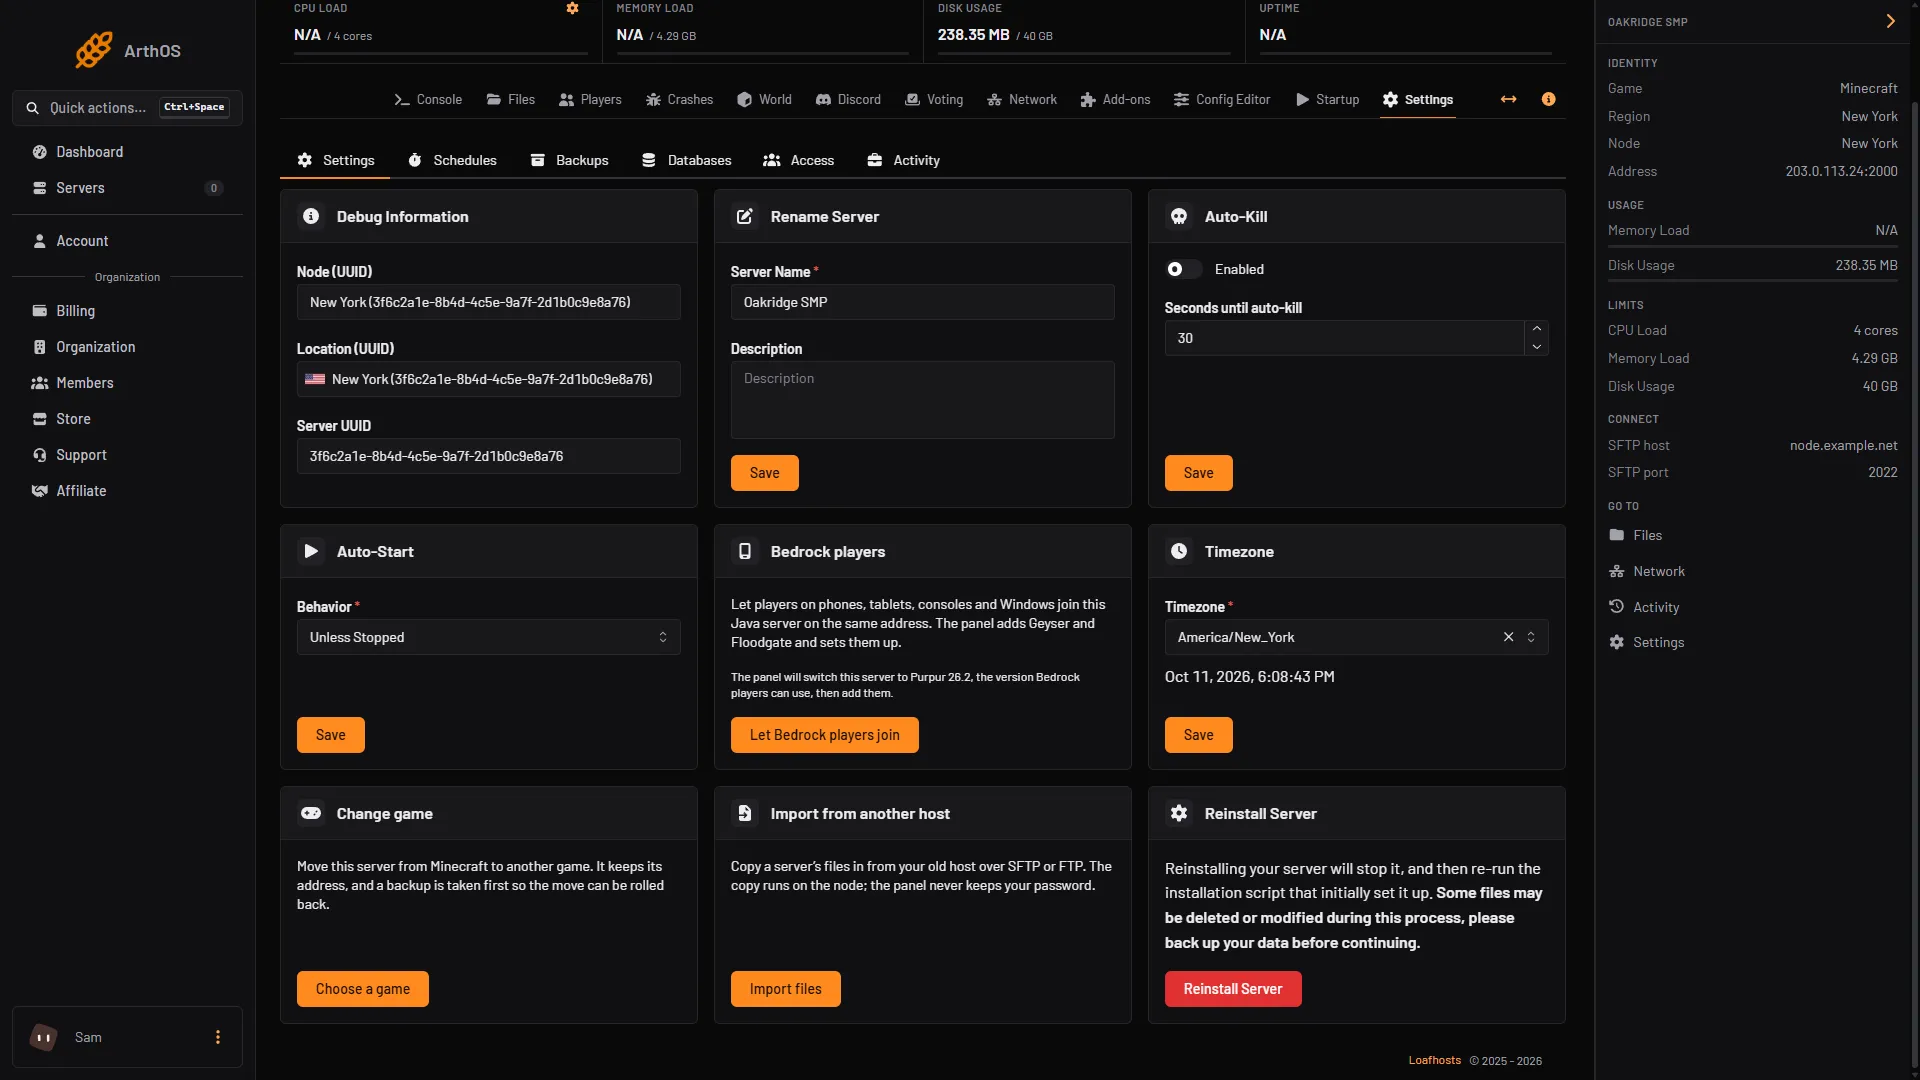
- Import from another host card
- Import files
- Fill in the dialog:
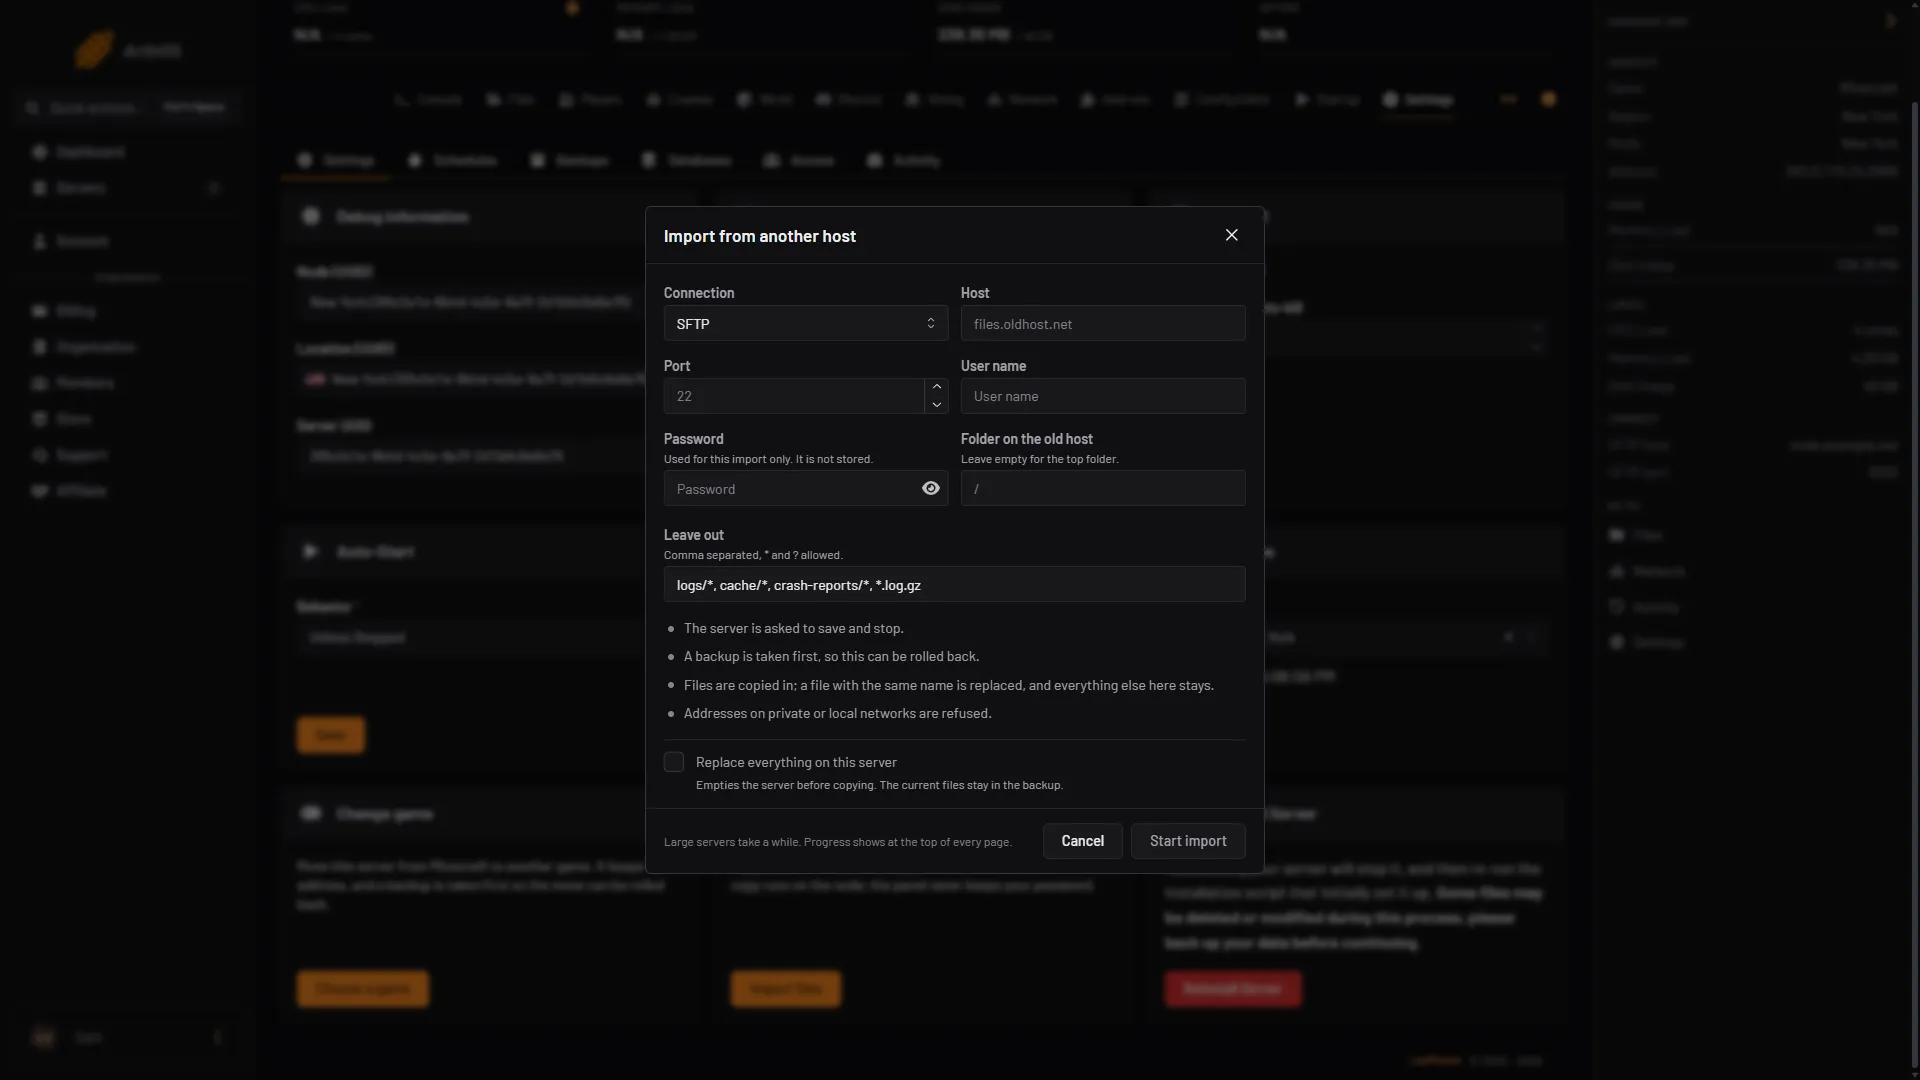
- Connection
- Host and User name
- Leave out
- Start import
- Connection (1): SFTP is the default. Use SFTP when your old host offers it; plain FTP is not encrypted. The list also has FTP with TLS and FTP (unencrypted).
- Host and User name (2), then Port and Password. The port is 22 for SFTP. The password is used for this import only. It is not stored.
- Folder on the old host. Leave it empty for the top folder.
- Leave out (3). It starts with
logs/*,cache/*,crash-reports/*and*.log.gz. Separate patterns with commas and use*and?. Add*.zipto skip old backups.
- For a clean move into a new server, tick Replace everything on this server. Then read What will happen. The server saves and stops, a backup is taken, and the files are copied in. A file with the same name is replaced. Every other file on this server stays.
- Choose Start import (4). Large servers take a while, and progress shows at the top of every page.
- When it says “Finished. The server can be started.”, check Files, then choose Start the server or press Start in the Console.
If no backup can be taken, the import stops and the error says why. A box named Continue without a backup then appears. Without a backup there is nothing to roll back to, so free a slot under Settings, Backups first if you can. See Minecraft server backups.
While the finished message is shown, Roll back puts the server back to the backup taken before the import.
After the import
- Open Add-ons, then Versions. The Running now card shows the software and Minecraft version the panel recognised from the jar. If it says it does not recognise the jar, choose software there. See change your server version.
- If the old server’s jar is not called
server.jar, open Startup and put its name in Server Jar File. - Do not worry about the port. The panel writes this server’s address and port into
server.propertiesevery time the server starts. - Check the whitelist. The files you copied in decide whether it is on.
- Start the server and read the start of the Console for plugin errors. See a plugin will not load.
By hand
Use this when the old host gives you no file access by address, or when the panel refuses the import.
- On the old host, stop the server.
- Download the server folder. In a file manager, select the folder and download it as an archive. With an SFTP program, download the whole folder. Check that
server.propertiesis in what you get. - Make it one
.zipfile with the server’s files directly inside it, not inside an extra folder. - On your new server, open Files, upload the zip with Upload, then Upload from computer, and open the zip row’s menu and choose Extract.
- Do the steps under “After the import” above, then start the server.
To move only a world, see upload or download a world.
If it does not work
- “that host name does not resolve”. The name is wrong or has a typo. Check it with your old host.
- “that host is on a private, local or reserved network”. The address points to a private network, which an import cannot reach. Use the host’s public address.
- “a backup cannot be taken”. Read the reason in the message. Free a backup slot, or tick Continue without a backup.
- “this server has had six imports today”. Each server can start six imports a day. Try again tomorrow, or use the by hand way.
- It stops with a login error. The user name or password is wrong, or the old host wants a different connection type. Try SFTP first, then FTP with TLS.
- It stops part way. An import is cut off after three hours. Add big folders you do not need to Leave out, or use the by hand way.
- The server will not start after the import. Open the Console and read the last lines. A jar with another name needs Server Jar File. A Java version that does not fit the Minecraft version is fixed by choosing the software again in Versions, which sets the Java for you.
More on the game: Minecraft servers.
Sources: minecraft.wiki: Java Edition level format, docs.papermc.io: Migration